Showing posts with label Crafting. Show all posts

Monday, September 17, 2018

Easy DIY Baby Quilt


I love when I have the opportunity to make gifts. It hasn't happened enough in the past seven years (since my first son's birth, to be exact). 

This incredibly simple baby quilt is one of my go-tos. I made one of these for Henry and loved it. This time, I used a super thick and soft fabric for the back, since the baby will be born at the start of winter. Also, the thickness will make this blanket useful as a cushion for putting the baby on the floor in various rooms of the house. 

Here's some specific directions about how to do it (and a picture of a quilt with more strips, which I'm realizing--in retrospect--looks better! Oh, well. It's the thought that counts!)

The trick for fitting this into my already full life was to start working on it far in advance! One day I went to the fabric store. Another day I washed the fabrics. Another day I ironed the fabric. Then I cut the strips. And finally I put everything together. 


Share |

Tuesday, January 16, 2018

DIY: Marker on Porcelain Tray


Over the vacation, I spent a lot of time obsessing about my new office. I think I've already mentioned that this is the first time in my 40 years on Earth that I have ever had my own office at work, and it's the first time in 10 years that I have had my own space to decorate (since Matt and I always have to reach consensus about how we decorate our home). So I'm excited! 

Decorating doesn't come naturally to me, so I have to do a lot of screen captures (shift + control + command + four on a Mac) and then pasting into Google docs to see how things look together. 

I decided to go with a dining room table instead of a desk, so that I can host meetings in my office. Since I won't have storage drawers within immediate reach, I decided to arrange my most needed essentials on a tray: stapler, tape, binder clips, paper clips, pens, highlighter, scissors, and sticky notes. 

I struggled to find the right kind of tray. I didn't want it to be wood, since the table is wood. I thought about a white lacquered tray, but the sizes didn't seem right. Then I landed on this serving tray and fell in love:


However, with shipping, the total cost would have been $70. I decided to pass on it. 

Then, while walking through an Australian Target to take Tate to the restroom, I swung by the home goods section and found what seemed to be the perfect tray. It was a plan white porcelain serving tray for $7, and I decided to put dots on it myself. We swung by the craft store, and the woman recommended a Posca Marker.  

Four hours later, my $12 replica was complete! 


Share |

Monday, January 8, 2018

DIY: Easy Napkin Rings


I'm still over here obsessing about my new office in my spare time. Ultimate nerd? Most definitely.

I'm making a special area for Tate and Henry that includes a couple of toys and some snacks. They'll be eating snacks on the floor, so I was trying to figure out a way to designate a specific area for eating (versus walking around and eating or spreading crumbs all over the place).

I purchased these placemats from IKEA and decided to make napkin rings to go with them.

I ordered these wooden napkin rings from Etsy (I got the single size).

Then I painted them (I recommend the gold strip part first and then the outside): teal mint, pure gold, terra coral, sea glass, and Christmas green.

Um, this hardly counts as a DIY tutorial. But that's the easiest kind of DIY project, right?

For updates in between blog posts, check out Instagram

----------------------------------------------


JOIN US!: Purposeful Conception Course: Preparing Your Mind, Body, and Life for Pregnancy, started today! Register now! There's still time for you to join us!


Share |

Wednesday, November 29, 2017

Holiday Gift Idea: Magnets


Are you still looking for holiday gift ideas? 

This year we used Social Print Studio to make refrigerator magnets for our family using family pictures that Matt took. We ordered the smaller ones and were happy with how they turned out. I highly recommend them!

(If you are looking for a less expensive, DIY version, I've also made magnets like this before and liked the results...)


Share |

Wednesday, November 15, 2017

DIY Zippered Pouches (and Thoughts on Being Instead of Doing)


This year I decided to make presents for my closest colleagues. I used to be that kind of person, but motherhood kind of erased it from my muscle memory. 

I had to make 11 in all, so I wanted something that was manageable. 

I decided on this zippered pouch. I find that "Batch Processing" helps a lot. I cut all the fabric at the same time, ironed everything at the same time, sewed on all the zippers, etc. The process of only focusing on one thing at a time makes the process more efficient. 

In retrospect, I should not take on a project like this in October/November. It's a time of year that gets too busy. I'm doing a good job of staying ahead of things (like holiday cards--which are ready to mail after Thanksgiving!), but there are too many things on my to-do list, and it's pushing me into "to do" mode instead of allowing me to be a person who can just be.  

I recently teared up while watching this video, entitled, If I Were a Young Woman Now...

It's about modern womanhood and the pressures we put on ourselves to be the perfect mother, the perfect friend. I think a lot about how I'm part of that pressure (which comes so heavily from the emergence of the blogging community). I also run e-courses about trying to have the best possible pregnancy and how to be the most purposeful parent possible. 

There's such a fine line between trying to intentionally and purposefully live your best life and frittering it away by overly focusing on all the wrong things. 

These kinds of lines really stuck out to me: 
If I had my time again, I wouldn't create a to do list. I'd create a "to don't do" list...If I were a young woman now, I'd spend less time doing and more time being. 
The truth is, I do want to be the kind of person who makes handmade gifts for friends but not because I feel pressure to be the perfect friend. I want to do it because making things with my hands feels good to me and gives me a deep sense of accomplishment. It's meditative to cut and iron and sew. I want my boys to see me start with a small nugget of an idea, research how to make it happen, work hard, make mistakes, demonstrate resilience, and feel successful in the end. It's a great way to spend long, Sunday afternoons while the boys just want to play creatively around the house. 

So next time I'll start earlier in the year. And not in any pressure-kind-of-way. No, I'll just start making handmade gifts and collecting them so that I can use them at the right moment. 


Share |

Tuesday, November 14, 2017

Magnolia Makers Market

Our school is organizing a makers market this year. I'm so excited! Our young Entrepreneurs for Change will donate a portion of their profits to the non-profit organization of their choice. 

Henry is making keychains. It's been a fun lesson in micro-loans, comparing the prices of materials in order to find the most inexpensive options, planning our your time, etc.

If you're in Austin, you should stop by and see us! You can get your free tickets below...


Share |

Tuesday, April 18, 2017

DIY: A Simple Curtain


With the new house going up next door, our days of basking in unadulterated natural light and unhindered views of trees are now gone! 

Our shower and our bedroom used to face an empty forest. Now they face a two-story house! 

I got tired of shlepping my bathroom stuff into the boys' shower, so I eventually broke down and made a little privacy curtain. I am finally at a place where I can admit to myself that I don't like sewing. I love the idea of being able to make things for myself that meet my needs exactly, but I do not enjoy the process. Luckily this one was pretty quick! 

These grommets are miracle workers. Seriously. You just cut a circle out of the fabric and snap these bad boyz together. Voila! 

I purposely went with a white fabric to continue to let in as much light as possible. 

It feels strange to finally recognize that sewing is not a hobby of mine. I've honestly enjoyed the end results so many times that I got confused. It's liberating to understand that I should do it if I really, really need something, but I should consider it work and not a hobby. I think the book I'm reading right now (Essentialism: The Disciplined Pursuit of Less) is helping me be more discerning! 


Share |

Monday, September 26, 2016

Halloweeeeeeeeen!


We are now entering into All-the-Holidays-Start-Coming-So-Fast territory. Halloween will be here next month. Then Thanksgiving. And then Christmas.

I need to have a yearly list of everything that needs to get done around this time. I'll save that for another post!

As for Halloween, it's one of my favorite holidays. I used to love it more before I had children. I know that sounds weird, but I loved spending a lot of time making an awesome costume for myself. Now that I'm responsible for 3-4 costumes, it's a lot less fun. I now do a combination of handmade + buy some stuff so I'm not so stressed out. 

I thought last year was going to be the end of our group costumes, since I knew Tate would have more opinions now that he's three. For the past two years, we've been letting Henry choose what he wants to be, and we create a whole theme around whatever he chooses:
  • Year 1 of Family Costume = Henry chose to be an elephant, so we made a circus theme. Tate (infant at the time) was a strongman. I was a clown. Matt was a box of popcorn.
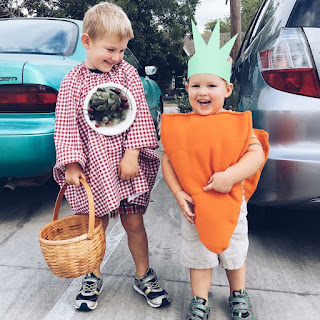
  • Year 2 of the Family Costume = Henry chose to be a picnic, so I was a pineapple, Tate was a carrot, and Matt was a bunch of grapes. 
This year Henry chose to be Peter Pan (after reading the book at counseling) and he convinced Tate to be Captain Hook, so I'm going to be Wendy and Matt is going to be Tinkerbell. I'm inspired to make Henry's costume from scratch using this tutorial. For Tate, I bought this costume off of Amazon. For my Wendy costume, I bought this nightgown and I will dye it blue. Matt is going to use this tulle to make a Tinkerbell costume similar to this one. Should be a good time! 


Share |

Tuesday, December 15, 2015

Easy DIY Ornament


I am on our staff holiday party planning committee this year. As part of my work, I volunteered to plan an easy DIY ornament project. 

I purchased all the supplies at Hobby Lobby:
  1. Ornaments
  2. Ribbon
  3. Glitter
  4. Stickers
Putting the project together was a cinch. I used a piece of paper to create a funnel that enabled me to put glitter in the ornament. Then I stuck on the stickers to spell "joy" and tied the ribbon to the top. Voila!

I'm all about easy and fun this holiday season! 

---------
Join us for the upcoming Purposeful Parenthood course! We'll be reflecting on the kind of family we are and the kind of family we want to become. Learn more...Register now!


Share |

Wednesday, December 9, 2015

Holiday Card Update


So back in October I was way ahead with getting my holiday cards done. I wrote a yearly update about my life and sent 16 photos to a graphic designer on Etsy to make the card. 

I was still ahead when I got them printed through Costco. And even when I picked up some awesome stamps from the post office. 

I started to fall behind while I was waiting for my return address stamp to arrive from Etsy, and now that I need to get more than 100 people's addresses, I'm really far behind! 

I need to hurry up!

Holiday cards have been arriving at our house, so I strung up some twine and clip each card to it with a tiny clothespin. It's really sweet. 

The holidays are so fun!
---------
Join us for the upcoming Purposeful Parenthood course! We'll be reflecting on the kind of family we are and the kind of family we want to become. Learn more...Register now!


Share |

Tuesday, November 10, 2015

Another Easy DIY Baby Quilt


I made another easy DIY baby quilt. I love breaking quilting rules in ways that make a project much quicker and easier.

For this project, I:
  • Decided on the ultimate size of the quilt (36" x 36").
  • I cut strips of fabric at various widths using a mat and a rotary cutter.
  • I ironed the strips.
  • I sewed the strips together (ironing down the seams between each addition).
  • Once the quilt top was ready, I placed it right side to right side with the fleece bottom and sewed it almost completely shut.
  • At the end I flipped it inside out and sewed the last bit closed. 
These quilts are so quick and satisfying!

Here's one I made for a friend and Tate.

And the one I made for baby Henry (when he was in utero and we were calling him "Coconut".


Share |

Tuesday, October 13, 2015

DIY Easy Knit Kid's Winter Hat


I can't believe I'm finally feeling the urge to craft again! Hooray!

I really want to make the boys some hats and scarves for winter. I searched Pinterest and was lured by many amazing options (like the one featured below), but in the end, I decided to go with the easiest pattern available: this one


Share |

Wednesday, October 7, 2015

Finding Sanity Amidst Wedding Planning Craziness


A colleague of mine is getting married soon, and I volunteered to do something off of her to-do list in an attempt to help reduce her stress. She asked me to sew 10 gift bags for her guests. 

With any DIY project, the prospect of doing it seemed much easier than the reality. At the beginning of the project, I texted her and asked, "If I have leftover fabric, do you want me to make more than 10?" Thank goodness she said no. The project was so hard! 

She wanted the bags to be lined, which complicated the process. Also, I ran out of fabric when I was trying to make 20 straps, so we had to take a strip of leftover fabric to the store and hunt around for the same fabric. 

Then there was the part where I couldn't find a safety pin and had to get creative about how to turn 20 straps inside out. 

Then there was the fact that I wasn't following a pattern so when I got to the very last part I found myself trying to sew through things that were too thick. So I broke my sewing needle. Twice. And then the safety function kept engaging, which required me to use a screwdriver to pull apart my machine and put it back together. Every.Single.Time.

The experience reminded me of a couple sections from my wedding book: taking shortcuts on things that don't really matter and crossing off non-essential items from the to-do list. I went back to read them and found them helpful. I shared them above in case you or anyone in your life is going through the stress of wedding planning and needs a little dose of sanity. 


Share |

Tuesday, August 11, 2015

Hallowweeeennnn!


Yes, it's that time of year when I sound like a crazy person for planning Halloween so early. It takes me a lot of time to brainstorm ideas and then execute something! 

This year, we are replicating what we did last year: We let Henry pick his costume, and the rest of us plan around him. This year will be our last year of going down that path, since Tate will be three next year and will likely want to go his own way. 

I sat down with Henry and had him use his moveable alphabet to spell out his ideas. He immediately new what he wanted to be: a picnic basket. I'm thinking we'll make him a little romper out of a table cloth and glue a plate with some plastic food to his body. We can buy him tights and sew some ants crawling up his leg.

The possibilities for the rest of us are endless! I think we will reuse our homemade strawberry costume for Tate (he has already agreed to be a strawberry). I'm thinking about one of those balloon grape costumes for Matt. And I'm thinking about being a pineapple. So fun! 


Share |

Monday, December 15, 2014

DIY Pants for Kids


Henry's been having a big problem with his pants lately, either that they are too tight around the waist or too loose. We've tried elastic pants and zipper pants, as well as a belt, and our strategies just don't seem to be working. I finally gave in and decided that I want to sew five pairs of pants for Henry to wear to school. 

Our school has a uniform. It's very liberal--the youngest children choose from three different color polo shirts or a school t-shirt, and navy or khaki for bottoms. I decided to go with navy blue corduroy for his winter pants. I ordered five yards of this fabric.

I'm going to use my favorite pattern of all time (pictured above). I used it to sew seersucker pants for Henry a year and a half ago.

I'll let you know how it goes!


Share |

Tuesday, October 14, 2014

New Hobbies!

Image courtesy The Purl Bee

So sorry I missed posting last week! It's for a good reason: I have hobbies again! 

I took a class at a local yarn shop to learn how to make this cowl

And I've been reading. 

And Matt and I have been playing speed Scrabble. We give ourselves one minute per turn. It's actually been a really fun way get in a quick game. It also makes the process feel more engaging because we aren't looking at our phones or doing something else during the other person's turn. The only way it doesn't completely stress me out is if I spend the first couple seconds coming up with any word (even if it's not worth very many points). That way, I'm not anxious about the timer going off too soon because I know I can play something. 

Life is good!

----------------------------------------------
REMINDER: Registration is now open for the next Purposeful Conception Course: Preparing Your Mind, Body, and Life for Pregnancy, which starts on October 20thRegister today! We'd love to have you join us!


Share |

Tuesday, April 29, 2014

Kitchen Island Chalkboard


It's finished! We finally converted our kitchen island wall into a chalkboard. I had the idea to do this before we even built our house (I just though it would be the perfect place for our boys to have a big open canvass). Once we started using the space (picture lots of scuff marks from feet), I realized it made even more sense to turn it into a chalkboard. 

Steps:
  1. I wish I would've sanded the wall to smooth it out. Note to self for next time! I think the bumps look okay, but they make writing difficult.
  2. Tape around the edges. I prefer Frog Tape to regular painter's tape.
  3. Cut in the edges with a paintbrush and this paint.
  4. Roll the rest of the space.
  5. Wait the requisite drying time.
  6. Repeat one more time. 
  7. Wait the requisite amount of drying time and then rub up and down the entire wall with a piece of giant sidewalk chalk to "cure" it. 
  8. Erase the whole thing. 
If I were more ambitious, I would have put a couple coats of magnetic paint under the chalkboard paint for even more fun! 


Share |

Wednesday, July 3, 2013

DIY Kid Pants


Thank you for all the support and love! I look forward to writing an update soon. For now, here's a post I wrote before Tate's arrival...

Now that summer is in full swing in Austin, so are the mosquitoes. Henry must have the sweetest kind of blood or else he spends an inordinate amount of time outside or maybe his mom is adverse to using the kind of bug spray that actually works (no DEET for us) or perhaps he scratches bug bites and scabs more than the average kid.
 
Or all of the above!
 
I've tried keeping his nails really short, applying non-DEET bug spray religiously, using band-aids to prevent the scratching, and taking a more laissez-faire attitude and letting it all go.
 
So far, nothing has worked. Now it's time to switch to pants.
 
Of course Austin summers and pants are archenemies, but I am honestly out of ideas. I figured the only way to wear pants during a Texas summer would be to find them in a seersucker material. Since we try to facilitate Henry's independence as much as possible in our Montessori home, we also look for pants with an elastic waist  so he can pull them up and down with ease when dressing or using the toilet. And since we're on a tight budget as we prepare to drop back down to one income, we look for pants that are cheap, cheap, cheap.
 
The best option seemed to be to make them. Fortunately, I found this amazing, free pattern and tutorial (thank you, Dana, for putting so much goodness out into the world!). I was able to purchase four yards of seersucker (in blue and red), elastic for the waist, and new thread for less than $35. Since each pair of pants takes a 1/2 yard, the total cost for each pair is about $4.38.
 
When making the pants, however, I realized that I could only make two pairs out of each yard by running the stripes horizontally. I won't lie about the fact that I'm pretty disappointed that Henry will not look as stylish as Dana's son (with his vertical seersucker pants), but a budget mama has to do what a budget mama has to do. I simply couldn't justify doubling the cost of the pants simply to run the stripes the other way.
 
Oh well.
 
The process was pretty simple as far as sewing projects go. I used pinking shears to prevent as much fraying as possible along the seams (since I don't have a serger). The waist band was a little tricky since the pants are designed to sit lower in the front than the back. But overall, it was a pretty quick and painless process.

----------------------------------------------
REMINDER: Registration is now open for the next Purposeful Conception Course: Preparing Your Mind, Body, and Life for Pregnancy, which starts on July 14. Register today! We'd love to have you join us!


Share |

Tuesday, June 11, 2013

When Good Is Good Enough


I've talked a little about how I'm trying to be very intentional about the things I replicate about my pregnancy with Henry and the things that I let go. For example, it was important for me to start a scrapbook for the new baby during my pregnancy, just like I did for Henry. I also made the new baby a simple quilt like I did for Henry.

A while ago, I stated my intention to also make a pillow for his bed. My reasoning was more aesthetic than sentimental; I think Montessori floor beds can look pretty plain. For Henry I designed a little house pillow. This time around, I wanted to use a bigger and more comfortable pillow for breastfeeding in the middle of the night (after about the two-month mark when the baby starts sleeping in his own room). I settled on this design, which I was excited about because I was going to learn how to do piping.

I bought the pillow early on during a trip to IKEA but started dragging my feet about buying fabric. I didn't want to spend money on new fabric, but I also wasn't happy with anything in our existing collection.

And then I hit 36 weeks and started fretting about my lack of preparation. I definitely think I was overcome with panic rather than the classic nesting urge. I finalized our to-do list, starting shopping for non-perishable labor snacks, set up a little lamp with a dimmer switch for breastfeeding, ordered our birthing kit, delegated tasks to Matt, organized our bedroom, etc.

I also decided it was time to do something about the pillow (or lack thereof). I went into our craft room (which also functions as our guest room), and laid down on the futon that we had recently set out for out-of-town guests. I must have laid there for a solid 15 minutes just staring at our tupperware bins full of fabric. These days, it feels so much better to lie down than to stand up. I had serious trouble mustering the motivation to move.

So I didn't. I just lay there and tried to figure out what I wanted to do about the pillow. I happened to be laying on an old pillowcase from IKEA (which I bought in 2003 when I first moved to Houston), and that's when the idea hit me. Why not repurpose one of them into the baby's new pillowcase?

I had to sew two straight lines to decrease the width and height of the pillowcase to make it fit the new pillow. Then I trimmed the excess fabric, turned it right-side-out, put it on the pillow. And voila! A simple, inexpensive solution (that just happens to have sentimental value!).


Share |

Tuesday, March 19, 2013

Handmade Goodness for Baby


The other night, Henry did something that melted my heart. We had a friend over for SXSW, so the noise in the living room woke Henry up around 11pm. I went into his room and asked him if he wanted some water. He said yes, got up, walked over to his bookshelf, drank some water, set his glass down, picked up the framed ultrasound picture of his brother, gave it a wet kiss, set it down, asked for a hug and kiss from me, went back over to his bed, and fell asleep. 

I keep trying to tell him that the baby won't be able to do much at first, but he's still really excited about his arrival. Last weekend we finally got around to finishing the baby's blanket. We cut the pieces for it a while ago, but we finally sewed them together. It's really cute to hear the pride in Henry's voice when he says, "I made it." 

The other thing I made for Henry that I also want to make for the new baby is a pillow for his bed. I made this house pillow to go with Henry's cityscape sheet. This time, I'm thinking about making a bolster pillow like the one featured above via Spoonflower

It would just be large enough to stretch across the width of his crib mattress floor bed. A quick search of the IKEA website reveals that they have this pillow:


It's 24 inches long, which will be just about right for the mattress which is about 28 inches long.

Here are the baby's sheets:
I'm thinking about these two fabrics from SewMamaSew for the pillow:


I'll probably work on Henry's duvet cover first and then see how much energy I have left over for another sewing project.


Share |

Related Posts with Thumbnails